
Assembly of Pegaso C4 Structure
How to assemble the Pegaso C4 structure for fixed Cosmi chassis:
The installation of the Pegaso structure is quick and easy. Using this installation manual, you can assemble Cosmi’s Pegaso structure with its Rodax function precisely to achieve a professional façade finish.
How to assemble the Pegaso C4 structure

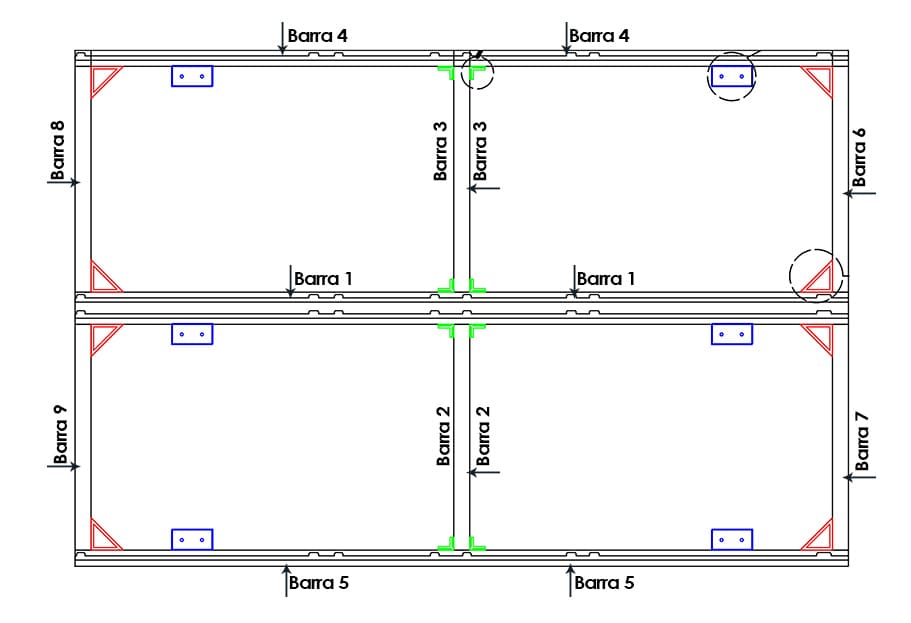
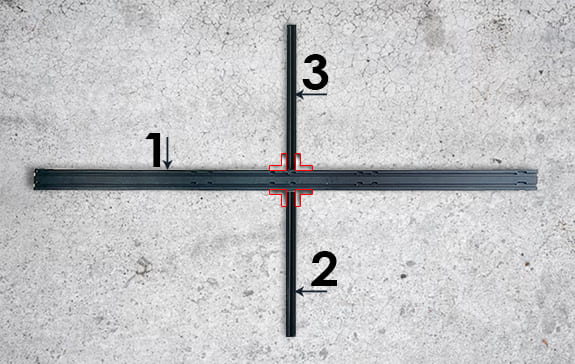
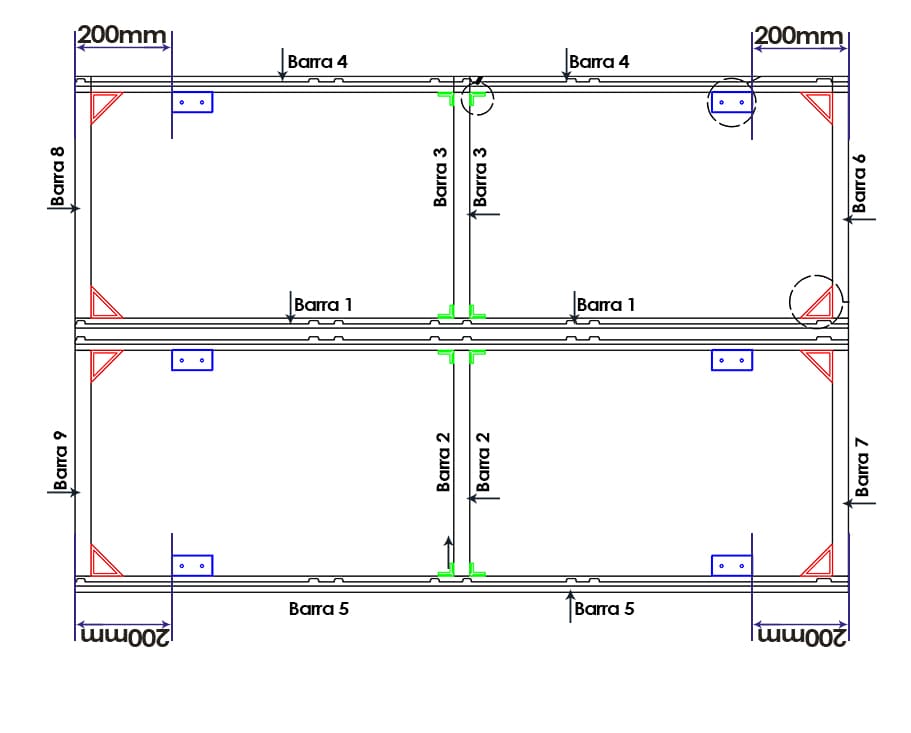
To simplify assembly, each bar is numbered for easier explanation and assembly. Refer to the technical drawing below.
Assembly of Pegaso C4 Structure
List of materials for Pegaso C4 structure
- 40*80*1920mm bar (2748192). Central. 1 unit
- 40*40*1920mm bars (2744192). 2 units
- 40*40*56mm bars (2744056). 6 units
- Angular L joint cover (281100). 8 units
- Structure clamps (281105). 4 units
- Clamp covers for structure (281104). 4 units
- M8 screws for wall plates (284107). 8 units
- Nuts for M8 screws on plates (284103)
- L plates for wall mounting (2712105). 4 units
- End caps for 40*40 profiles (283102). 4 units
- End caps for 40*80 profiles (283103). 2 units

#STEP 1: Positioning the 40*80 central bar
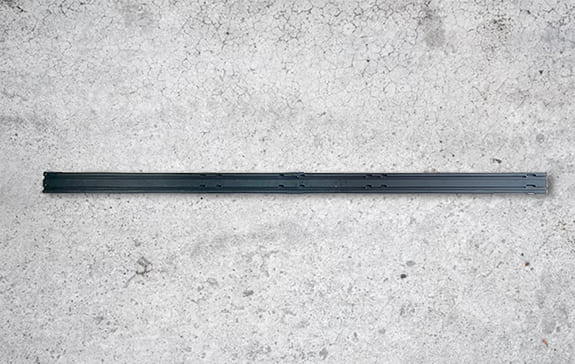
To start assembling the Pegaso C4 structure, the first step is to place bar 1 (2748192).
Usually, this installation is done on the ground and then, once the structure is assembled, it is placed in its intended location.
Assembly of Pegaso C4 Structure
#STEP 2: Positioning bars/profiles 2 and 3
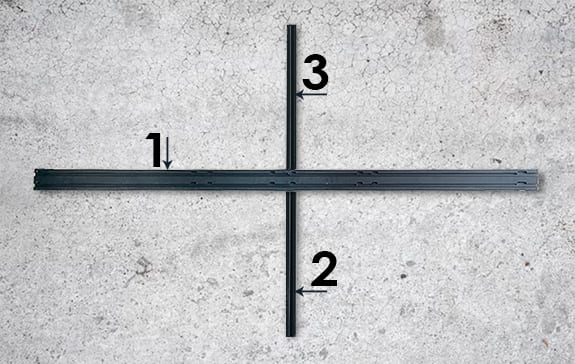
This step is crucial. Place the central 40*40 bars (2744056) profiles 2 and 3 on the ground. This step precedes the next, which involves joining the central 40*80 bar with these 40*40 bars.
Follow the technical drawing to position the bars. As shown, bars 2 and 3 should be placed in the center.
Assembly of Pegaso C4 Structure
#STEP 3: Joining and screwing bar 1 to bars 2 and 3
After placing bars 2 and 3 on the ground in step 2, everything is ready for step 3.
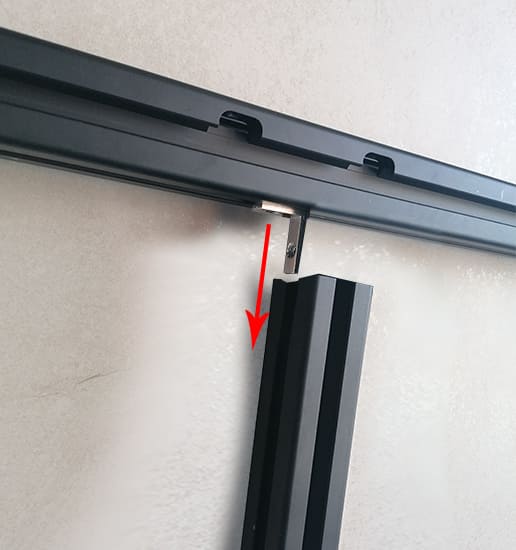
In this step, insert the angular joint (281100) at the ends of the rail of bar 1 until they reach the center. Place all 4 joints in their respective positions.
It is essential to follow this order; otherwise, it will not be possible to insert the angular joints into the rails of bars 1, 2, and 3.
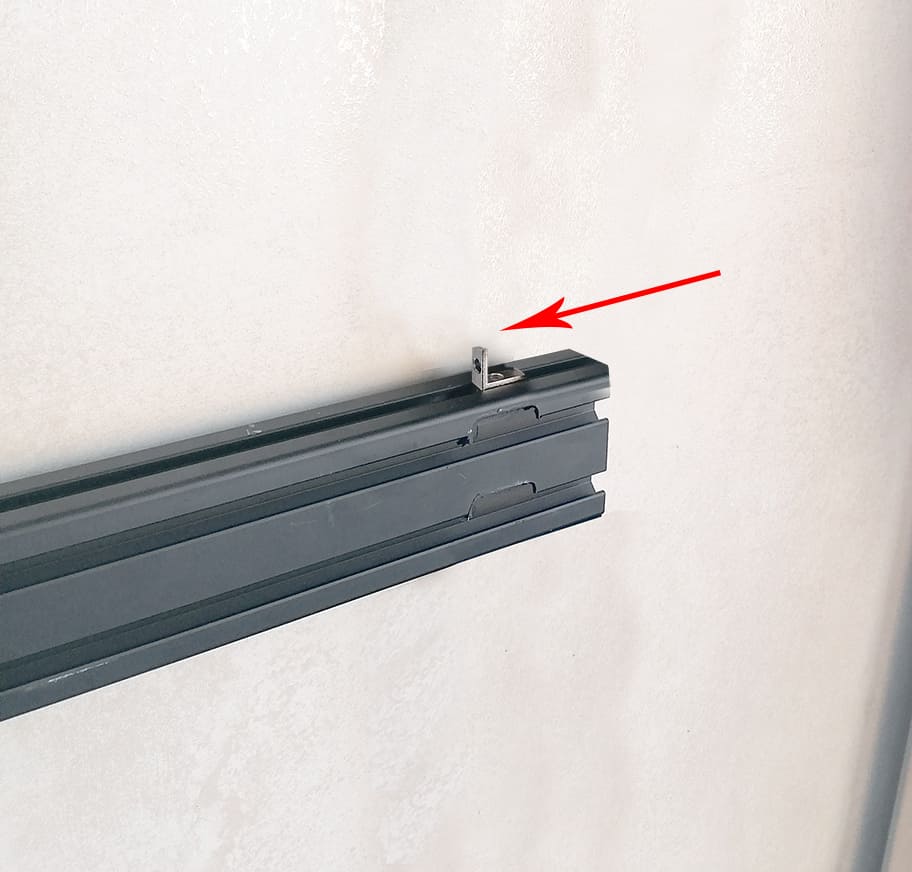
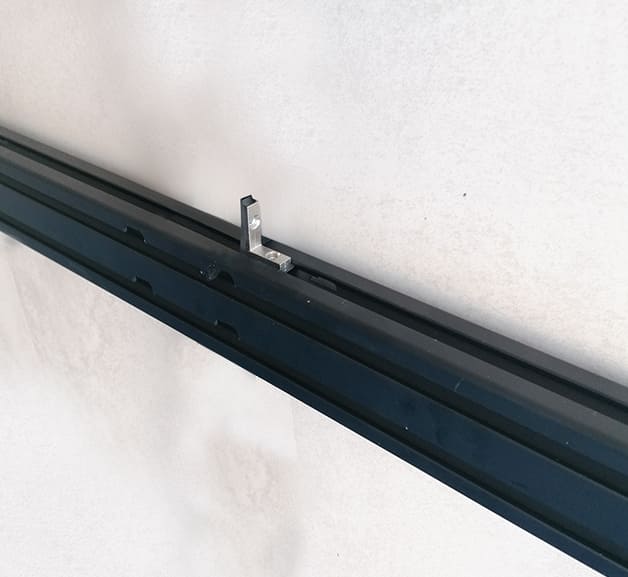
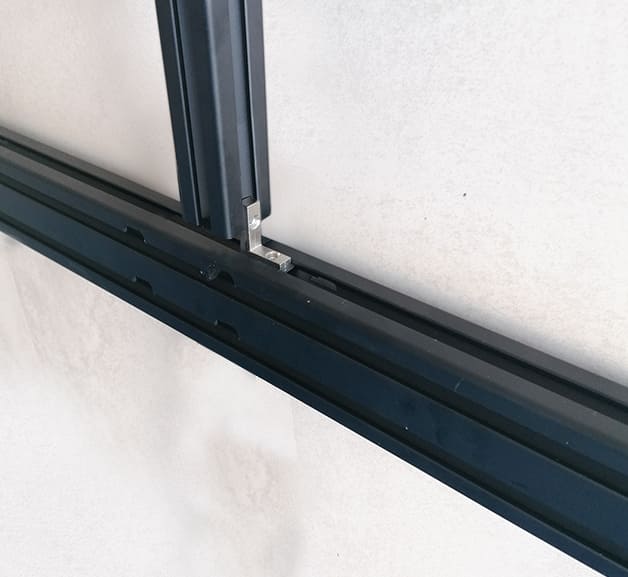
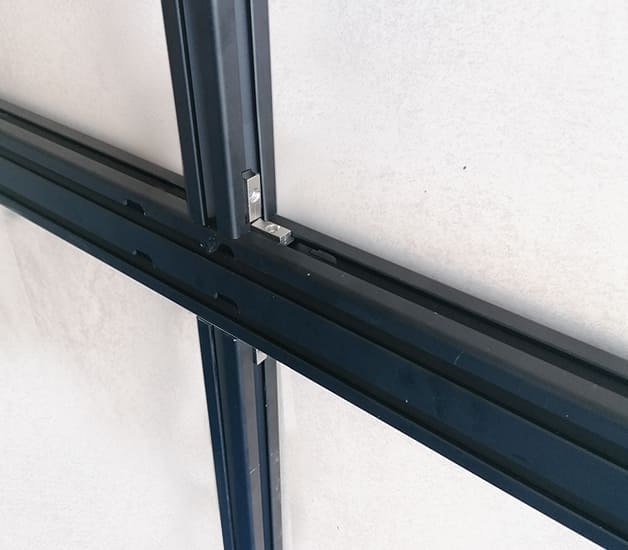
- 1. Insert the four L-joints (281100) into the rail of the central profile (bar 1).
- 2. When reaching the center, slightly separate bars 2 and 3 to insert the other end of the L-joint into the 40*40 profiles (bars 2 and 3).
- 3. Once the L is inserted into both the rail of bar 1 and the rails of bars 2 and 3, tighten the joints. There should be 4 joints on each side, as shown in the photo below.
Assembly of Pegaso C4 Structure
#STEP 4: Joining bars 4 and 5
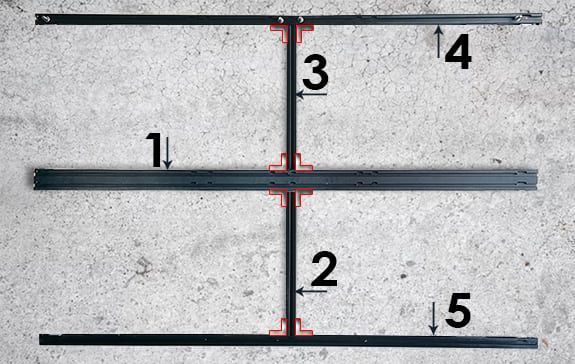
Once the central cross of the Pegaso structure is assembled, the next step is to join bars 4 and 5 (40*40*1920) to the central structure — the top and bottom bars. Use the L-joints (281100) from the previous step.
Insert two L-joints into their positions at the rail ends, then slide them into place until they reach the center.
Repeat this step for both bar 4 and bar 5.
Assembly of Pegaso C4 Structure
#STEP 5: Attaching side bars
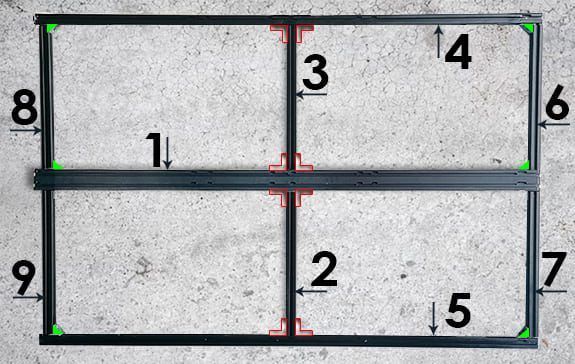
After assembling the center, top, and bottom parts, it’s time to attach the remaining sides to complete the Pegaso structure.
Use bars 6 and 7 on the right and bars 8 and 9 on the left. Tighten the remaining 40*40*56mm bars using structure clamps (281105) at each corner, as shown in the drawing.
After attaching all the clamps, place the corresponding covers (281105).
#STEP 6: Preparing L-plates
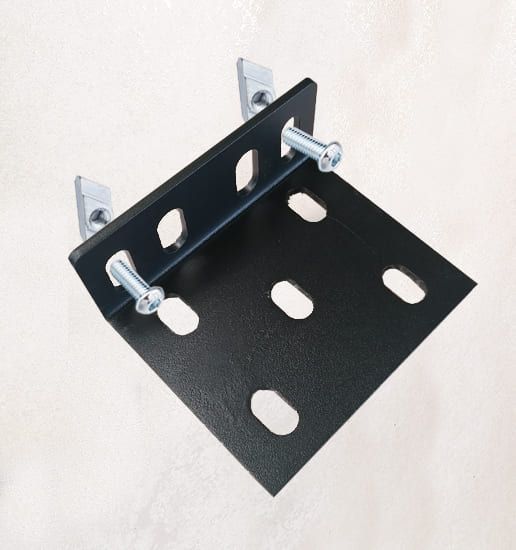
In this step, prepare the L-plates for wall mounting. Insert two M8 screws (284107) through the two holes in each plate and secure them with a nut (284103).
#STEP 7: Mounting plates onto the chassis
With all screws and nuts in place, attach the plates to the chassis. Position them approximately 200mm from the edge.
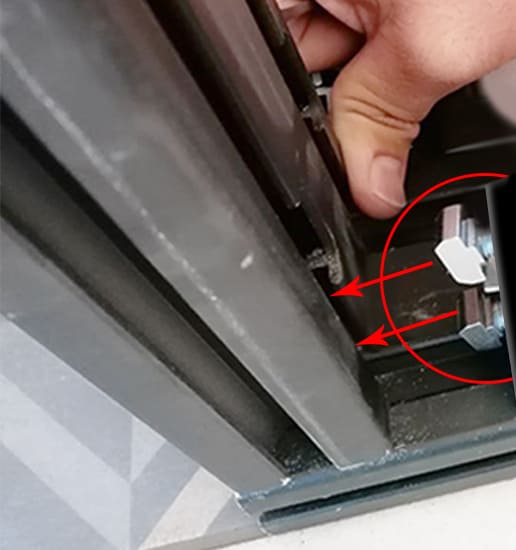
Insert the nut (284103) into the profile, and then tighten the screw to secure the plate.
#STEP 8: Adding profile covers
Once the structure is complete, attach the profile covers or plugs to the bar ends. Start with the four 40*40 plugs for bars 4 and 5 and the two plugs for the 40*80 central bar (bar 1).
Precautions and Final Recommendations
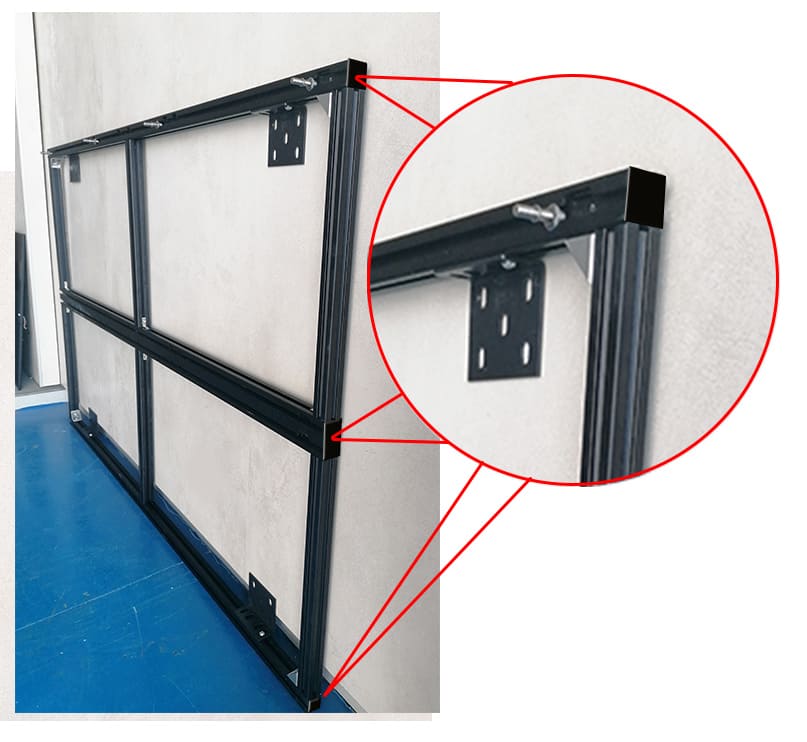
The structure is now ready to be mounted on the wall.
WARNING: When mounting on the wall, ensure all screws and joints are tightened correctly to avoid any risk.
The Pegaso C4 is ready to use. Should you have any questions or require technical support, do not hesitate to contact the Cosmi team. Thank you for trusting Cosmi products!